
Weekly EP10: MQTT with the Arduino Uno R4 WiFi and EMQX
Connect your Arduino to a powerful MQTT broker to enable IoT communication.
Hello, EMQX community survey is in progress. Please submit your feedback on using EMQX: https://forms.office.com/r/djjc373Bvm
MQTT with the Arduino Uno R4 WiFi and EMQX
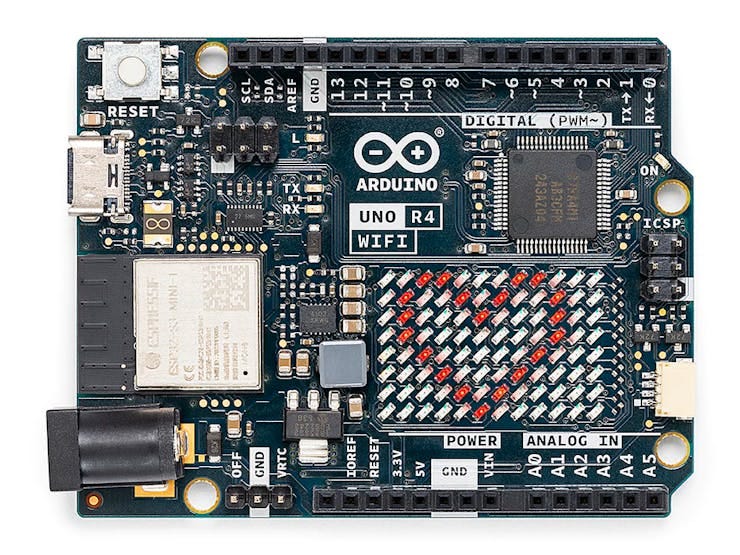
What is IoT and the Arduino Uno R4 WiFi?
If you've found this guide, you may already know the IoT stands for Internet of Things. Which is a general concept of devices and services that are connected in ways that enable automation. This guide will teach you how to connect the latest Arduino Uno R4 WiFi to an IoT protocol called MQTT that enables communication with other devices and applications.
For example, you could connect your Arduino to another device running Home Assistant with MQTT integration and make a custom home automation device or home sensor.
What is MQTT?
MQTT, or Message Queuing Telemetry Protocol, is an open standard for allowing devices or applications to publish and subscribe to messages using named topics as routes (i.e. /sensors/temperature). It has built-in features like QoS (Quality of Service) that let you specify how you want to prioritize or guarantee message delivery. Its a favorite of IoT hobbyists and industrial automation alike.
EMQX is an open-source MQTT broker (the server that devices publish and subscribe through) with well-rounded security, efficiency, and scale. It can be run locally, in the cloud, and even on a Raspberry Pi.
Running EMQX Locally and Creating a Client User
As it stands today the libraries that exist for connecting Arduino devices to MQTT are not compatible with creating an SSL connection on the Arduino Uno R4 WiFi. So while we cannot connect to it to EMQX Serverless, we can do so using EMQX open-source which allows connections without having to provide a Certificate.
EMQX can be installed on a local machine or cloud instance in a number of ways. The easiest is to follow the instructions for your operating system here https://www.emqx.io/downloads
All these instructions are for running in the terminal of your operating system. You can also build the project from source via GitHub. https://github.com/emqx/emqx
Once installed and running, the EMQX admin dashboard can be found at
http://127.0.0.1:18083/
You'll need to create user credentials for a client, in this case the Arduino, to connect as. Use the following instructions.
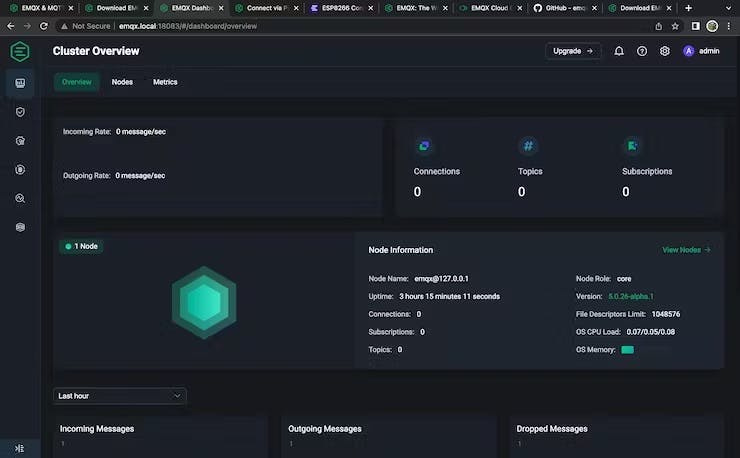
Open the EMQX Dashboard and login with the default username "admin" and password "public".
From the dashboard navigate to the Authentication page.
Click on + Create.
Select Password-Based and click Next.
Select Built-in Database and click Next.
Leave all the default settings and click Create.
From the Authentication page, under the Actions column for the Password-based authenticator, click Users.
Click the plus icon to create a new user with a username/password.
Setting up the Arduino IDE and Libraries
Install the latest Arduino IDE.
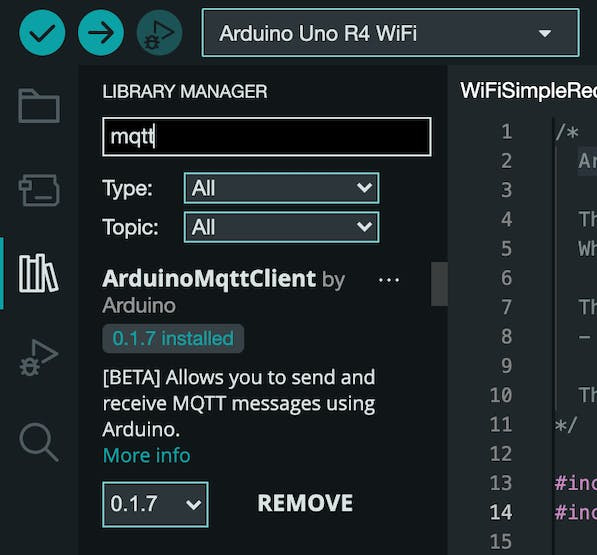
Install the ArduinoMqttClient library. You can do so easily from the Library Manger.
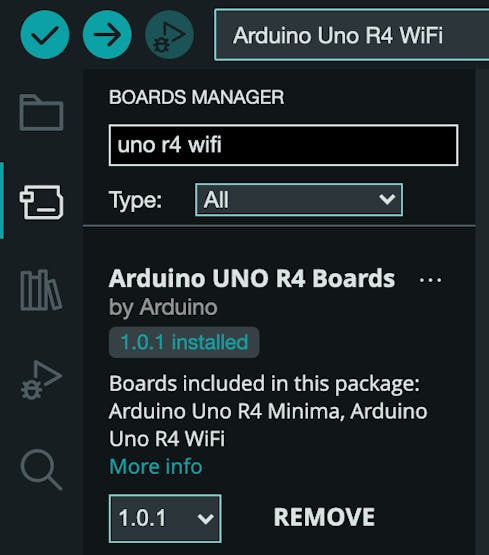
Install the Arduino Uno R4 WiFi Board by searching it from the Boards Manager.
Program the Arduino Sketch
The Arduino sketch creates a basic program that connects to your WiFi network, connects to the broker as the user created on your EMQX broker, subscribes to messages on a topic and publishes every 3 seconds to a different topic. Its a basic boiler plate that can be used to build more complex projects.
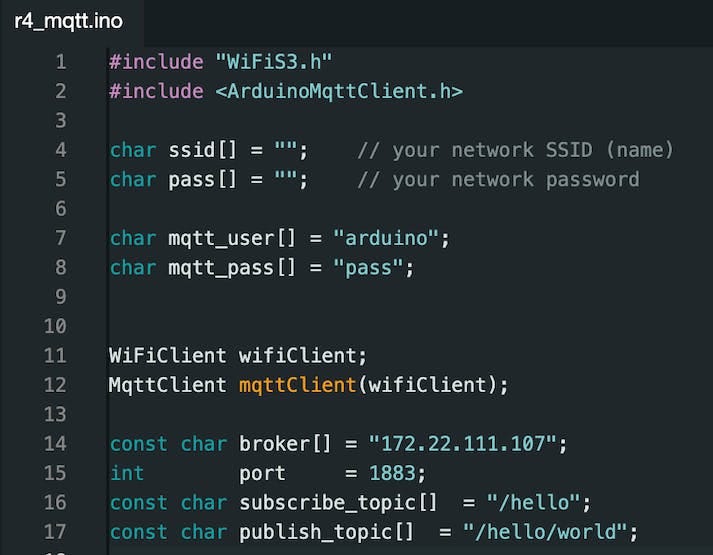
Create a blank sketch in the Arduino IDE and copy this sketch in.
#include "WiFiS3.h"
#include <ArduinoMqttClient.h>

char ssid[] = "";    // your network SSID (name)
char pass[] = "";    // your network password

char mqtt_user[] = "arduino";
char mqtt_pass[] = "pass";

WiFiClient wifiClient;
MqttClient mqttClient(wifiClient);

const char broker[] = ""; //IP address of the EMQX broker.
int        port     = 1883;
const char subscribe_topic[]  = "/hello";
const char publish_topic[]  = "/hello/world";

void setup() {
  // Create serial connection and wait for it to become available.
  Serial.begin(9600);
  while (!Serial) {
    ;
  }

  // Connect to WiFi
  Serial.print("Attempting to connect to WPA SSID: ");
  Serial.println(ssid);
  while (WiFi.begin(ssid, pass) != WL_CONNECTED) {
    // failed, retry
    Serial.print(".");
    delay(5000);
  }

  Serial.println("You're connected to the network");
  Serial.println();

  // You can provide a username and password for authentication
  mqttClient.setUsernamePassword(mqtt_user, mqtt_pass);

  Serial.print("Attempting to connect to the MQTT broker.");

  if (!mqttClient.connect(broker, port)) {
    Serial.print("MQTT connection failed! Error code = ");
    Serial.println(mqttClient.connectError());

    while (1);
  }

  Serial.println("You're connected to the MQTT broker!");

  Serial.print("Subscribing to topic: ");
  Serial.println(subscribe_topic);

  // subscribe to a topic
  mqttClient.subscribe(subscribe_topic);

  // topics can be unsubscribed using:
  // mqttClient.unsubscribe(topic);

  Serial.print("Waiting for messages on topic: ");
  Serial.println(subscribe_topic);
}

void loop() {
  int messageSize = mqttClient.parseMessage();
  if (messageSize) {
    // we received a message, print out the topic and contents
    Serial.print("Received a message with topic '");
    Serial.print(mqttClient.messageTopic());
    Serial.print("', length ");
    Serial.print(messageSize);
    Serial.println(" bytes:");

    // use the Stream interface to print the contents
    while (mqttClient.available()) {
      Serial.print((char)mqttClient.read());
    }
    Serial.println();
  }

  // send message, the Print interface can be used to set the message contents
  delay(3000);
  mqttClient.beginMessage(publish_topic);
  mqttClient.print(random(1000));
  mqttClient.endMessage();

}
At the top of the sketch configure your WiFi credentials, the user credentials from your EMQX broker, the IP address of where your broker is running, and the topics you would like to use.
Plug the Arduino Uno R4 WiFi to your computer using a USB Type-C cable.
In Tools > Board select Arduino Uno R4 WiFi.
In Tools > Port select the corresponding port for your Arduino.
Click the Upload arrow.
Once uploaded open the Serial Monitor from the Tools menu in order to monitor the device logs and view messages received.

Serial Monitor showing a message received on an Arduino from the MQTTX client
Connecting a Client to EMQX using MQTTX
MQTTX is a free tool that helps you test client connections to an MQTT broker. It also lets you publish and subscribe to topics. We'll use it to connect to the EMQX broker running using the user credentials created earlier.
Download, install, and open the MQTTX application.
Click on the plus icon to create a New Connection.
Name your connection, supply the username/password, and set the hostname to match the one configured on your Arduino Uno R4 WiFi.
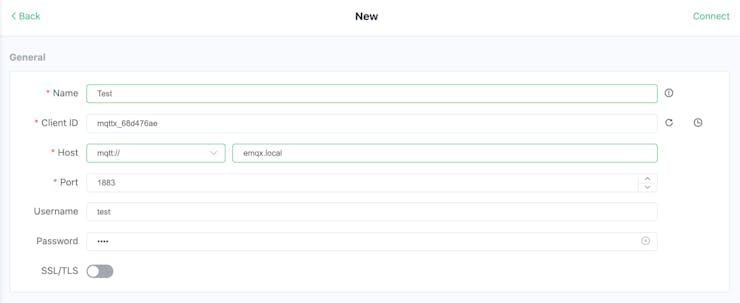
Click Connect.
Publishing & Subscribing to Topics using MQTTX
Topics are named routes for knowing where a message is going to or coming from. They use a slash notation. For example, sensors/temp or sensors/humidity.
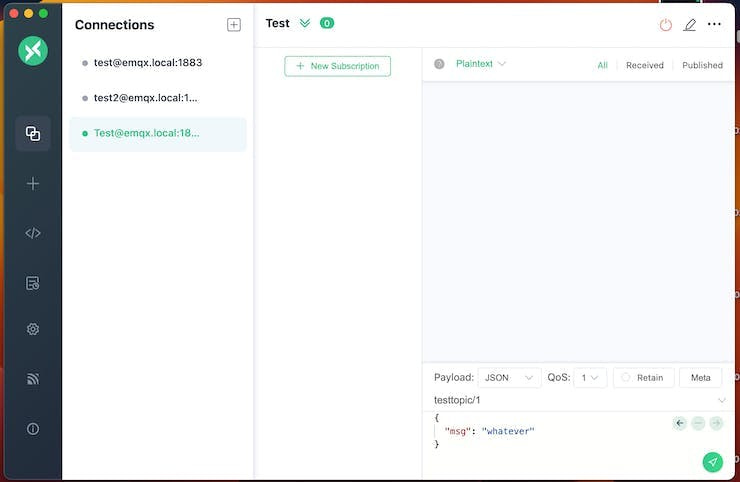
To publish messages to a topic, connect a device, construct a payload in the visible text box, and use the send button to publish it. The following image shows how to send a simple JSON message to testtopic/1.
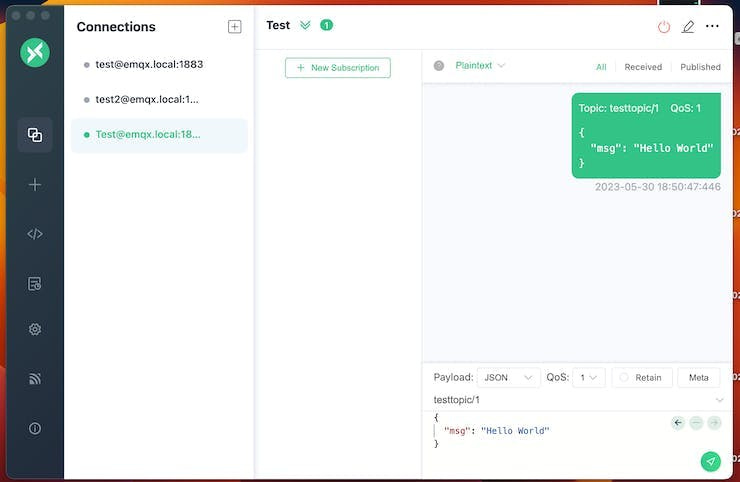
To subscribe to a message, click on New subscription and supply the topic you'd like to subscribe to. Any message published to that topic will appear in the window for that connection. Try this out by creating a new user, a new connection, and subscribe to a topic that the other connection is publishing to.
You can also subscribe to all sub-topics under a topic using the # pound sign. For example, the topic sensors/# would yield any message published under the sensors/ topic.
Try publishing and subscribing to the topics set on your Arduino Uno R4 WiFi!
ArduinoJSON
The example sketch we used earlier shows how to publish and subscribe to raw messages on topics. What if you need to publish or receive messages in JSON format? JSON stand for Javascript Object Notation, its a pattern of using keys and values such as { "some_arbitrary_key_name": "value" }
This example sketch is configured exactly the same as before, but uses the ArduinoJSON library to add a JSON parser.
#include "WiFiS3.h"
#include <ArduinoMqttClient.h>
#include <ArduinoJson.h>

char ssid[] = "";    // your network SSID (name)
char pass[] = "";    // your network password

char mqtt_user[] = "";
char mqtt_pass[] = "";


WiFiClient wifiClient;
MqttClient mqttClient(wifiClient);

const char broker[] = "emqx broker address";
int        port     = 1883;
const char subscribe_topic[]  = "/hello";
const char publish_topic[]  = "/hello/world";

void setup() {
  // Create serial connection and wait for it to become available.
  Serial.begin(9600);
  while (!Serial) {
    ;
  }

  // Connect to WiFi
  Serial.print("Attempting to connect to WPA SSID: ");
  Serial.println(ssid);
  while (WiFi.begin(ssid, pass) != WL_CONNECTED) {
    // failed, retry
    Serial.print(".");
    delay(5000);
  }

  Serial.println("You're connected to the network");
  Serial.println();

  // You can provide a username and password for authentication
  mqttClient.setUsernamePassword(mqtt_user, mqtt_pass);

  Serial.print("Attempting to connect to the MQTT broker.");

  if (!mqttClient.connect(broker, port)) {
    Serial.print("MQTT connection failed! Error code = ");
    Serial.println(mqttClient.connectError());

    while (1);
  }

  Serial.println("You're connected to the MQTT broker!");

  mqttClient.onMessage(onMqttMessage);

  Serial.print("Subscribing to topic: ");
  Serial.println(subscribe_topic);

  // subscribe to a topic
  mqttClient.subscribe(subscribe_topic);

  // topics can be unsubscribed using:
  // mqttClient.unsubscribe(topic);

  Serial.print("Waiting for messages on topic: ");
  Serial.println(subscribe_topic);
}

void loop() {
  // call poll() regularly to allow the library to receive MQTT messages and
  // send MQTT keep alives which avoids being disconnected by the broker
  mqttClient.poll();

  // send message, the Print interface can be used to set the message contents
  delay(3000);
  publishMessage();

}

void onMqttMessage(int messageSize) {
  Serial.print("Received a message with topic '");
  Serial.println(mqttClient.messageTopic());
  StaticJsonDocument<256> doc;
  deserializeJson(doc, mqttClient);
  const char* message = doc["message"];
  Serial.print("Message: '");
  Serial.println(message);
}

void publishMessage()
{
  StaticJsonDocument<200> doc;
  doc["time"] = millis();
  doc["sensor_a0"] = analogRead(0);
  char jsonBuffer[512];
  serializeJson(doc, jsonBuffer); // print to client

  mqttClient.beginMessage(publish_topic);
  mqttClient.print(jsonBuffer);
  mqttClient.endMessage();
}
Where do I go from here?
Now that you know how to deploy an EMQX MQTT broker, connect an Arduino Uno R4 WiFi, publish/subscribe to topics, and how to use another MQTT client such as MQTTX you have all the tools necessary to create awesome IoT projects!
MQTT is popular protocol and there is a client library for every language and platform. You could try connecting it to Home Assistant using the built in MQTT integration and the EMQX Add On or an existing EMQX broker. Or use this guide by Alex Glow on how to use the Arduino R4 built in LED Matrix and use another MQTT client, such as a webpage, to control the animations.
🛠 EMQ Tech Blog
By bridging FINS Data to MQTT, users can safely and conveniently implement the IIoT platform on demand with enhanced connectivity, resulting in significant improvements in production efficiency, cost savings, and product quality. → Read more.
Azure IoT Hub, a cloud service provided by Microsoft, is a fully managed service that enables organizations to manage, monitor, and control IoT devices. Together with the Azure IoT Hub, EMQX Cloud, can provide a complete solution to match the Azure IoT ecosystem. → Read more.
JWT Authentication and JWKS Endpoint in MQTT: This article will introduce the basic principles of Token-Based Authentication based on JWT, and how to build your own JWKS Endpoint. → Read more.
MQTT Performance Benchmark: In this post, we provide the benchmark result of EMQX connection - a single node EMQX processes 5M concurrent connections. → Read more.
EMQX-TimescaleDB Integration: In this post, we provide the benchmark result of TimescaleDB integration - a single node EMQX processes and inserts 100,000 QoS1 messages per second to TimescaleDB. → Read more.
🕐 Upcoming Events
MQTT Made Easy with EMQX Enterprise 5.1! We're hosting a session on the groundbreaking features of EMQX 5.1. Dive into MQTT over QUIC, larger file transfer capabilities, IoT data channel unification, and comprehensive integration views. This is the future of MQTT you don't want to miss! → Register Now!
EMQ Office Hours: Join us for EMQ's inaugural Office Hours on August 23, 2023! This is your chance to interact with experts from our organization, learn about our products, and get answers to all your product and sales-related questions. Don't miss out on this unique opportunity to connect with the EMQ community! → Register Now!
Google Cloud Next: After a three-year absence, Google Cloud will host an in-person event for its annual developer and partner conference, and we couldn’t be more excited to be at this event. Discover the most recent Google innovations in areas such as AI, data, security, productivity, and more. → Register Now!
⚙ EMQ Products Update
EMQX Enterprise 5.1.1 is now officially released! This version adds QoS level and retain flag checks in authorization to allow more flexible client access control. It also introduces 3 new random functions in rules SQL to meet specific use case needs. Additionally, multiple bugs have been fixed. → Read more.
Neuron is an industrial IoT server that can connect with diverse devices simultaneously using multiple protocols. It aims to address the challenge of accessing data from automated equipment and provide infrastructure support for smart manufacturing.
Previously, all available modules of Neuron only offered a 15-day free trial. Now you can enjoy a permanent free license with no more than 30 data tags! —>Get started now!
EMQX Cloud is an MQTT middleware for the IoT from EMQ. As the world's first fully managed MQTT 5.0 cloud messaging service, EMQX Cloud provides a one-stop O&M colocation and a unique isolated environment for MQTT services. —>Get started free!